

If you’re setting up Appmax for the first time, you’re probably here for one simple reason: you want payments to work smoothly, approvals to be high, and customers to finish checkout instead of disappearing at the last second.
That’s exactly the kind of job Appmax is built for. It’s a payment technology platform used by digital businesses that want a more optimized checkout flow, better payment approval performance, and tools to recover lost sales (especially when customers choose Pix and don’t complete the payment right away).
In this quick start guide, I’ll walk you through how to get started, what to set up first, how to avoid common beginner mistakes, and how to go from “account created” to “taking payments confidently” without guessing your way through it.
To keep things simple, we’ll focus on what a first-time user actually needs: account basics, store settings, payment methods, integration paths, testing, and a clean go-live checklist. And yes, we’ll talk about Pix, because in Brazil it’s a major deal, growing fast and representing a large share of non-cash transactions.
What is Appmax and why do beginners choose it?
Appmax is positioned as a payment platform for digital businesses, with features aimed at improving approvals, reducing friction at checkout, and recovering abandoned or incomplete payments. On its own site, Appmax highlights tools like Pix recovery via automated reminders and claims about payment approval performance and recovered sales value.
For beginners, the real value is not just “accept payments”. It’s making checkout less fragile. Many stores lose revenue because customers abandon carts, get distracted, or run into payment errors. Across e-commerce, cart abandonment averages around 70% based on large-scale research.
So even small improvements in checkout completion can be meaningful.
Here’s what you’re usually trying to solve with Appmax as a first-time setup:
- Accept common payment methods your audience expects (including Pix)
- Reduce failed payment attempts and friction
- Make checkout feel trustworthy and fast on mobile
- Recover sales that would have been lost
Before you start: what you should have ready
You can set up Appmax faster when you gather a few basics upfront. This avoids the frustrating loop of “start signup, pause, hunt for info, repeat.”
Have these ready:
- Your business information (company details, store name, support email)
- Your domain and store platform details (Shopify, WooCommerce, VTEX, Loja Integrada, custom site, etc.)
- Banking details for receiving payouts (where required)
- A clear idea of how you’ll sell
Digital products, physical products, subscriptions, affiliates, cross-border, etc.
If you’re integrating with an e-commerce platform, also keep admin access handy. You will likely need to install an app or configure a payment provider inside your store settings.
Step 1: Create your Appmax account the right way
First-time users often rush account creation, then later realize the “small” details they skipped show up on the customer’s statement, invoices, or checkout identity.
During signup, pay attention to:
Store name and descriptor
Use a store name customers recognize. If the statement descriptor doesn’t match what the customer remembers, you increase confusion and refund requests.
Support email and contact flow
Set your support email to one you actually check. Payment disputes and customer questions are time-sensitive.
Business model selections
If the platform asks about your business type or category, be accurate. It can affect risk rules, anti-fraud settings, and how your account is reviewed by partners.
Appmax also presents itself as a platform with no fixed costs on some plans, focusing on per-sale fees, and it provides a pricing and FAQ-style page explaining common account questions.
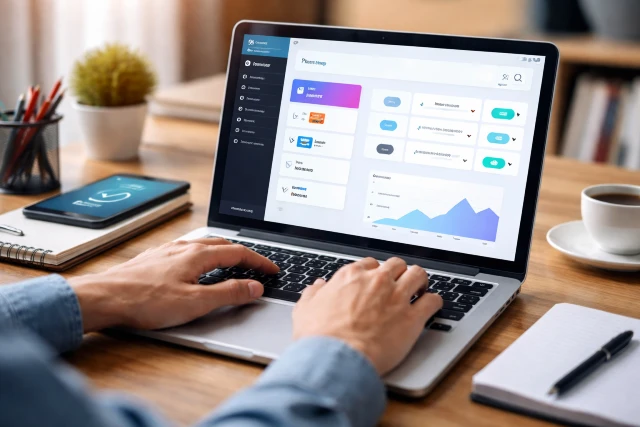
Step 2: Configure the essentials inside your dashboard
Once your account is created, don’t jump straight into “install integration”. Start by setting up the essentials that influence the customer experience.
Set your checkout identity
Inside your settings, confirm:
- Store name shown at checkout
- Branding elements (where available)
- Customer support contact info
- Order confirmation preferences
The goal is simple: a buyer should feel confident they’re paying the right business.
Choose your payment methods wisely (especially Pix)
Appmax supports common payment methods used in Brazilian e-commerce such as credit cards, boleto, and Pix depending on your configuration and integration. VTEX’s documentation, for example, describes Appmax as a provider that can enable sales through credit cards, bank invoice, and Pix.
Why Pix matters: Brazil’s Central Bank has reported Pix growth and its expanding share of non-cash payments, showing why many stores prioritize it in checkout.
If your audience prefers Pix, make it visible and easy. But also plan for the reality that Pix checkouts can be “started and forgotten.”
That’s where recovery features come in.
Enable Pix recovery or reminders (if available)
Appmax promotes Pix recovery via automated reminders through WhatsApp, aimed at bringing customers back to complete payment, and cites an average recovery rate for these flows on its site.
Even if your exact results vary, the concept is useful: reduce the number of buyers who intended to pay but got distracted.
Step 3: Pick your integration path
Your setup will look different depending on where you sell. The main idea is the same:
- Connect Appmax as a payment provider
- Configure credentials or authorization
- Test transactions
- Go live
Below are common integration routes.
Option A: Integrate Appmax with VTEX
VTEX provides a straightforward setup tutorial for adding Appmax as a payment provider. The process generally includes navigating to payment providers in VTEX Admin, selecting Appmax, and authorizing the connection.
If your audience includes store owners, this is a good point to mention because VTEX is widely used in Brazil, and official documentation is usually the safest baseline for configuration steps.
Option B: Integrate Appmax with Loja Integrada
Appmax’s help center includes guidance for integrating with Loja Integrada, including selecting Appmax as the gateway and following the install and login steps.
This is often the quickest route for first-timers because it’s closer to “install app, connect account, configure settings” than a fully custom gateway setup.
Option C: Custom or developer-led integration
If your store is custom-built, you’ll likely need developer support to integrate payment flows securely. In that scenario, your priority as a first-time user is:
- Making sure checkout pages load fast and clean on mobile
- Confirming webhooks or payment status updates correctly reflect paid/unpaid orders
- Ensuring refund and dispute handling is well-defined
If you’re not technical, that’s okay. Your job is to make sure testing is thorough before real customers use it.
Step 4: Set up a clean checkout experience that converts
This is where beginners can get a surprising win. A lot of “payment problems” are actually checkout experience problems.
Cart abandonment is consistently high across e-commerce, with research often cited around the 70% range.
So small reductions in friction can move your revenue more than you expect.
Here are practical checkout tweaks that work well for first-time setups:
Keep choices simple
Don’t overwhelm buyers with too many steps. If the checkout supports it:
- Show the most popular payment options first
- Keep the form short
- Make totals and delivery timelines obvious
Reduce trust gaps
First-time customers silently ask: “Is this legit?”
Help them answer “yes” quickly:
- Display your business name consistently
- Offer clear support contact
- Use a professional checkout layout
Make Pix completion easy
For Pix checkouts, the “moment of truth” is completion. A good setup:
- Makes the payment instructions obvious
- Confirms what happens after payment
- Provides a clear “I’ve paid” or “check payment status” flow (where supported)
Step 5: Configure anti-fraud basics without hurting approvals
People hear “anti-fraud” and think it means blocking customers. In reality, the best setups aim for balance: fewer fraudulent orders without rejecting real buyers.
Appmax promotes a package including gateway, anti-fraud, and acquiring as part of a high-performance payments stack.
As a first-time user, focus on these basics:
- Make sure billing descriptors and receipts are consistent
- Use clear product descriptions and delivery expectations
Confusion drives refunds and disputes - Keep order confirmation messages immediate and clear
Chargebacks and disputes can be expensive and stressful. Some industry sources note typical e-commerce chargeback rates can sit around fractions of a percent to around 1% depending on vertical and risk, which is still meaningful at scale.
The biggest beginner mistake is not setting expectations. If your delivery timing is unclear, or the customer doesn’t recognize the transaction, disputes rise.
Step 6: Test everything before you go live
Testing is where a smooth launch happens. It’s also where first-time users tend to under-test because they’re excited to start selling.
What to test (minimum checklist)
Test these flows end-to-end:
- A successful credit card payment
- A Pix payment (start to completion confirmation)
- Refund process (even if it’s a small test order)
- Order status updates
Make sure “paid” becomes “paid” in your store system, not “pending forever”
A simple test table you can follow
| Test Item | What You’re Checking |
|---|---|
| Checkout loads on mobile | No broken layout, fast load |
| Payment approval success | Real payments process correctly |
| Pix completion | Customer understands steps, status updates |
| Confirmation email | Buyer receives receipt and next steps |
| Refund workflow | You can reverse a test payment properly |
If any one of these fails, fix it before you invite real traffic.

Step 7: Go live with a “first 48 hours” plan
Your first two days matter more than you think. This is when you catch issues early, before they turn into bad reviews or support chaos.
Monitor these metrics immediately
- Checkout conversion rate
- Payment failure rate
- Pix started vs Pix completed
- Support tickets about payment confusion
If Appmax features like Pix recovery reminders are enabled, watch whether incomplete payments drop over time. Appmax specifically highlights automated WhatsApp reminders for Pix non-completions as a recovery tool.
Common first-time Appmax setup mistakes
Let’s save you a headache. These are the mistakes that cause “Appmax isn’t working” complaints when the platform is fine, but the setup isn’t.
1) Not matching store name to what customers recognize
It increases refund requests and chargebacks because buyers don’t recognize the charge.
2) Launching without testing Pix properly
Pix is not “set it and forget it.” You need to confirm the status updates and customer instructions are crystal clear.
3) Forgetting mobile experience
A checkout that looks fine on desktop can be painful on a phone. And mobile abandonment tends to be higher than desktop.
4) No recovery strategy for incomplete payments
If you sell to an audience that loves Pix, you need a follow-up plan. Appmax promotes Pix recovery messaging as part of its value proposition.
Real-world setup scenarios for first-time users
Sometimes setup becomes easier when you can picture yourself in a real situation. Here are a few common ones.
Scenario 1: You’re launching a small online store in Brazil
Your priorities:
- Enable Pix prominently
- Keep checkout short
- Turn on recovery flows (if available)
- Monitor Pix completion daily for the first week
Why: Pix is widely used and still growing fast in transaction volume.
Scenario 2: You sell digital products and need fewer failed payments
Your priorities:
- Make sure checkout identity is consistent
- Reduce form friction
- Test card approvals across multiple cards if possible
- Prepare an instant “access delivered” confirmation email
Scenario 3: You’re using a platform like VTEX or Loja Integrada
Your priorities:
- Follow the platform’s official provider setup steps
- Authorize correctly
- Confirm the store platform marks orders as paid
VTEX and Appmax documentation describe the provider integration flow and installation steps.
Frequently asked questions (first-time Appmax users)
How long does Appmax setup take?
If you already have your business info and store admin access ready, initial setup and a basic integration can be done quickly. Appmax’s own materials also reference creating an account and starting tests in a short time window, depending on the integration and review requirements.
Can Appmax help recover abandoned Pix payments?
Appmax promotes Pix recovery using automated WhatsApp reminders for customers who start Pix but don’t complete the payment.
Results depend on your audience and message quality, but recovery flows are a proven concept in e-commerce because abandonment is common.
Which is better to prioritize: more payment options or a simpler checkout?
For first-time setups, simpler is usually better. Start with what your customers use most, then expand. Too many options can create hesitation. The best checkout is the one customers complete.
What should I do if my payments are getting rejected?
Start with basics:
- Confirm your integration credentials are correct
- Make sure your business details and category are accurate
- Test across different devices and networks
- Review checkout friction points on mobile
If you’re on VTEX, confirm the provider authorization flow is correctly completed, since that’s a common setup snag.
Conclusion
Setting up Appmax for the first time doesn’t have to feel technical or overwhelming. The smartest approach is simple: get the account details right, make checkout trustworthy, prioritize Pix if your market depends on it, and test the full payment loop before you go live.
Once your basics are solid, you can start improving performance with recovery flows and cleaner checkout decisions, which matters because cart abandonment is a persistent reality across e-commerce. And in Brazil, payment behaviors keep evolving quickly with Pix growth, so building a checkout that matches how people prefer to pay is not optional anymore.
In short: start clean, test thoroughly, and launch with a monitoring plan. Do that, and Appmax becomes a tool you control, not a system you fight.
In the last step, when you’re reviewing your full checkout flow, it helps to understand what a payment gateway actually does behind the scenes, especially if you’re comparing platforms or troubleshooting transaction steps.